Without a doubt, home floor plans help us manage multiple chores at once.
They assist in reducing any potential planning faults by helping to meticulously plan the future interior.
A floor plan is a need for carrying out exact construction house modification and renovation processes.
This crucial document for construction and remodeling can be created manually on paper or with the use of software.
Types of Plans:
Floor Plans on Paper:
You will be able to visualize a comprehensive and detailed scheme of your project by drawing floor drawings on paper.
You have the ability to use personal signs and markers in addition to generic ones to draw attention to significant information and locations.
This age-old technique works well.
A digital version created on a computer or tablet is ideal if you’d like to have more freedom and variety, such as the ability to share the house paper templates with people in order to get their opinion.
Floor Plans on a Computer or Tablet:
Even if this technique appears excessively complicated to users who lack technical expertise, there are numerous straightforward programs designed for DIY beginners.
Overall, using a computer to draw a floor design has various benefits:
- Using computer tools to draw is significantly quicker.
- Future changes to the plan are quite simple.
- Obtain the 3D plan based on the floor plan quickly;
- Easily share the plan with others.
We’ll go over the procedures for creating a floor plan on a computer in the article that follows.
Before You Start: Preparation
Site Measurements:
The initial task to complete is measuring the outer walls and defining the size of the inner walls if you don’t have to start from scratch and need to repair or renovate an existing home or flat.
Don’t forget to measure the height, width, and elevation of these things in addition to all the gaps between the doors and windows.
Taking a measurement of the moldings’ size is also very important.
On your iPhone or iPad, use Room Scanner to quickly measure your space and generate a digital floor plan.
Of course, if building a new home is your goal, you can skip this stage.
If You Are Planning a New House:
Of course, if building a new home is your goal, you can skip this stage.
Analyzing the available options on the market is essential before choosing the kind of structure you ultimately want to view.
You should decide how many stories, bedrooms, bathrooms, and entrances it.
To prevent the most frequent floor design errors, you must carefully plan your future home.
Many pre-made house plans are available online if you don’t know where to begin.
To determine the details you like and dislike, visit specialized architecture websites.
How to Draw a Floor Plan on the Laptop:
Digital floor plans are what we advise developing.
It’s fantastic news for those who have converted to using tablets since modern technology allows even a tablet to be utilized for this activity.

Find Interior Design Software:
Simple to highly skilled home design apps are available. A gadget must be installed for some of them to function online.
Native software that has been installed on a device typically offers additional features and makes full use of the operating system’s capabilities.
Using iOS apps that make use of the AR (Augmented Reality) technology that the platform supports are a nice example.
Because it requires an internet connection to function, online software is typically slower and more constrained.
Choose the Project Scale:
You must decide on the project scale before you start. A room is typically scaled at 1:25, a flat at 1:50, and a house at 1:100.
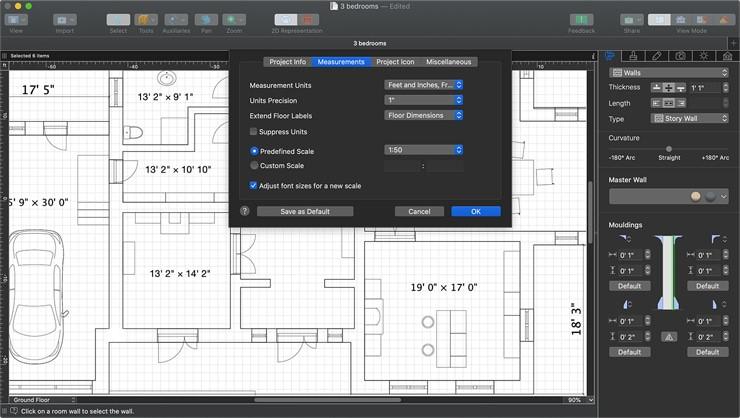
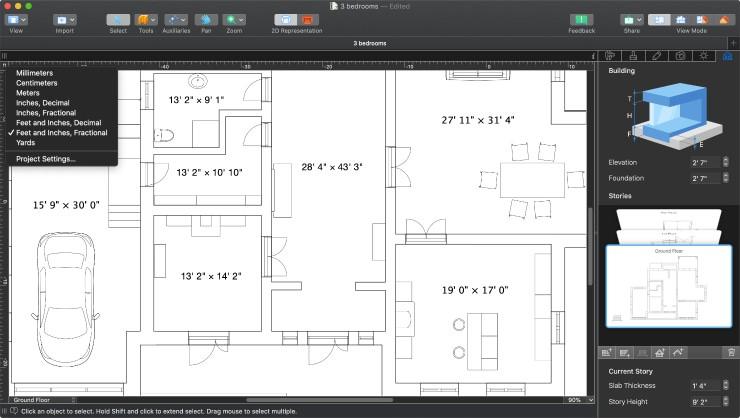
Choose Measurement Units:
Prior to starting work on your house plans, you should also consider measuring units.
Different measurement systems are used in different parts of the world.
Software that is distributed internationally usually comes with all the standard options, so be sure to pick the one that works best for you.
To do this, either choose it in the Project Settings dialogue box or click on the drop-down lists in the document window’s upper left corner.
Useful Tip- Import Your Floor Plan:
Some home design applications provide a blueprint import tool, which will further simplify and expedite the process if you’re planning a remodel and already have your floor plan printed on paper.
Simply scan or take a photo of your blueprint, export it as a jpeg or png file, and then trace it using Live Home 3D’s building tools.
You will need to locate the scale and measurement units on your printed floor plan in this situation and set them in the programme.


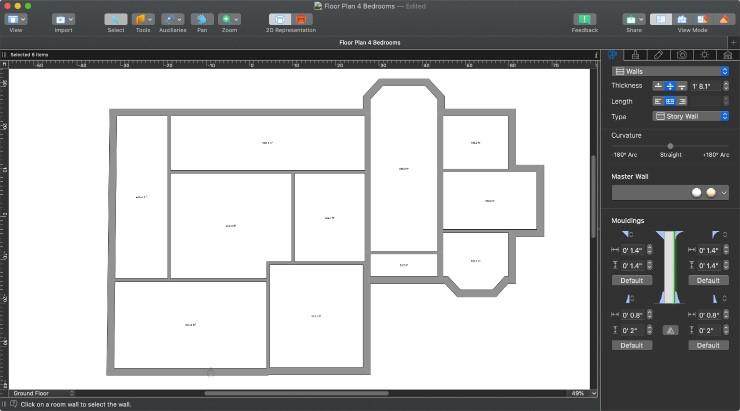
Draw Walls:
Of course, the floor plan begins with external walls.
Use it to draw the perimeter of the room or the house or retaining wall.
Some apps offer tools to create custom-shaped spaces.
Internal walls divide the house into separate areas. Add them carefully following your plan.
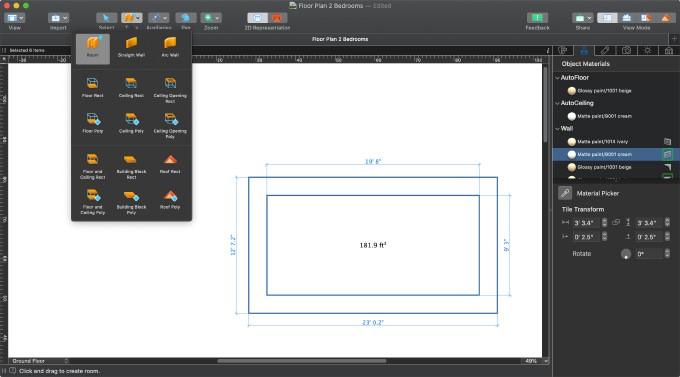
Draw Floors and Ceilings:
Draw flooring and ceilings to finish the rooms after you have finished with the walls.
Thanks to specialised tools like Floor/Ceiling Poly for custom-shaped floors and ceilings and Ceiling Opening Rect/Poly for ceiling openings, you can design floors and ceilings.

Useful Tip- Draw Complete Rooms:
You can sketch entire rooms with some apps.
The ceiling and floor of a rectangular room are made with the Room tool.
While you are drawing, the app shows the size of each wall.
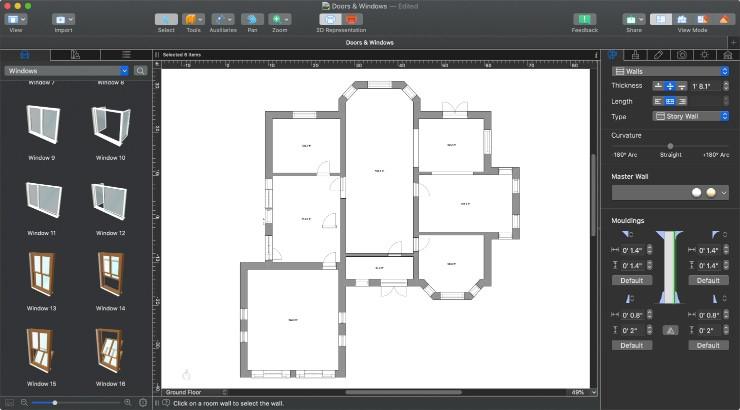
Add Doors and Windows:
Add doors and windows once you have drawn all of the walls, floors, and ceilings.
They will be seamlessly incorporated into the walls if you drag and drop them from a sizable built-in gallery.
Useful Tip: Set Distance Between Objects:
You can drag an object (such as a door, window, or piece of furniture) onto a design and then manually reposition it, or you can use the clever Dimension tool to define the distance between walls or other objects beneath the object.
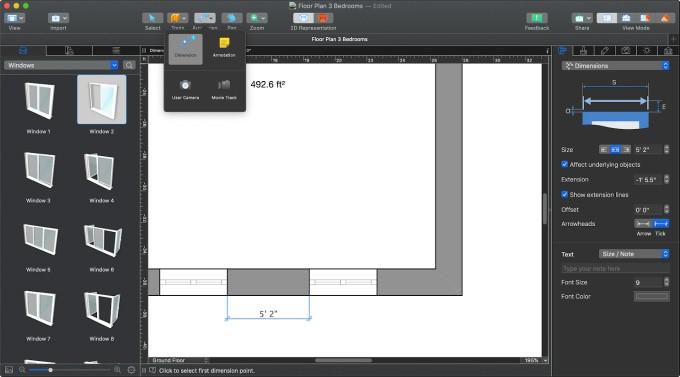
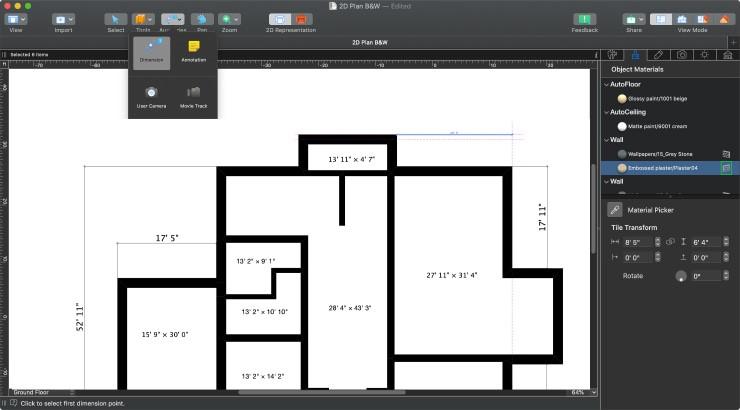
Add Dimensions and Mark Footage:
Measure and mark the distances between various objects to highlight critical distances.
Make sure to include footage markings on your design as they are a crucial component of a floor plan.
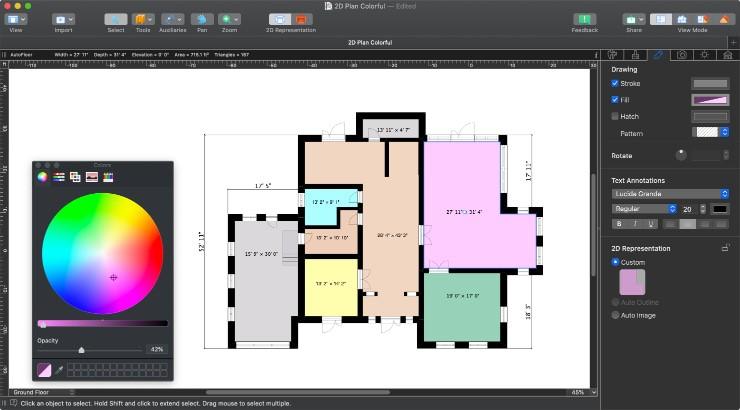
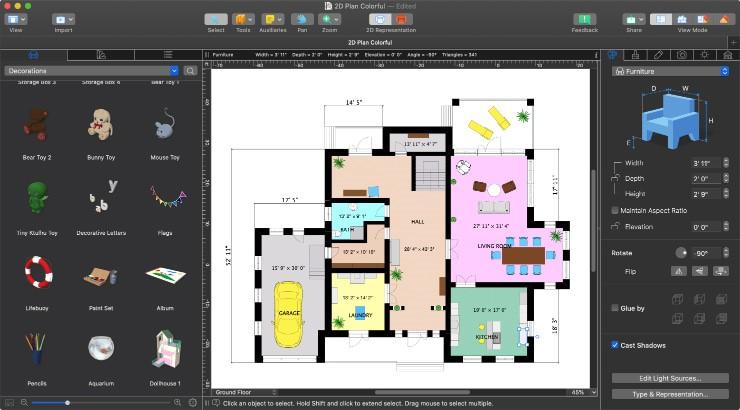
Mark Different Areas with Colors:
In order to improve the aesthetics of your floor plan and make it easier to distinguish between different sections, label certain parts with different colors.
By default, every wall and floor on the plan is designated with the same color.
By modifying the fill, stroke, and hatch parameters of the 2D drawings, you may choose distinct colors for various rooms to make the design appear clearer and more appealing.
Additionally, you have the option of choosing between outline and raster image representation, with the latter painting each object on the plan in its true color.
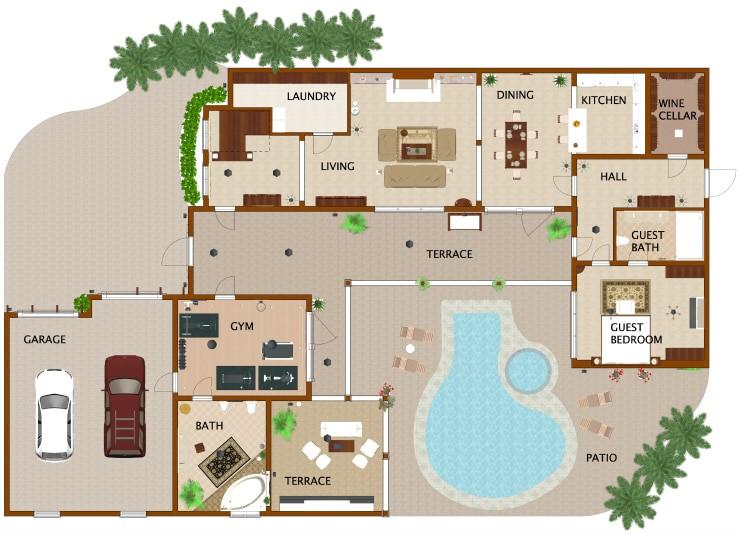
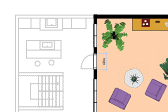
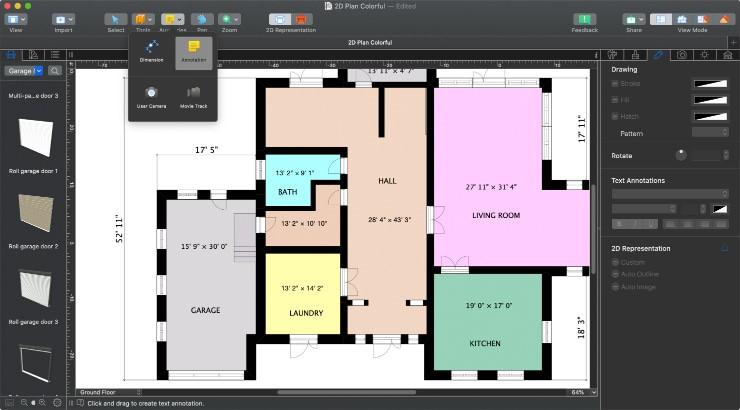
Label the Rooms:
Place labels in the flat or house to identify the rooms and all other spaces.
A clever method to make a layout simple to understand is to give each area a name, such as hall, kitchen, dining room, bathroom or bedroom.
With room labels, your floor plan will appear more comprehensible and professional.
Add Furniture and Stairs:
This is the stage where digital plans really start to shine.
To find the arrangement you like best, move the furniture around and add more.
Usually, the most important components—like stairs, baths, showers, toilets, and sinks—come first.
Then, arrange the necessary kitchen furniture and decide where to put the countertop, cooker, sink, refrigerator and dining table.
And then everything else, including beds, tables, plants, and decorations.
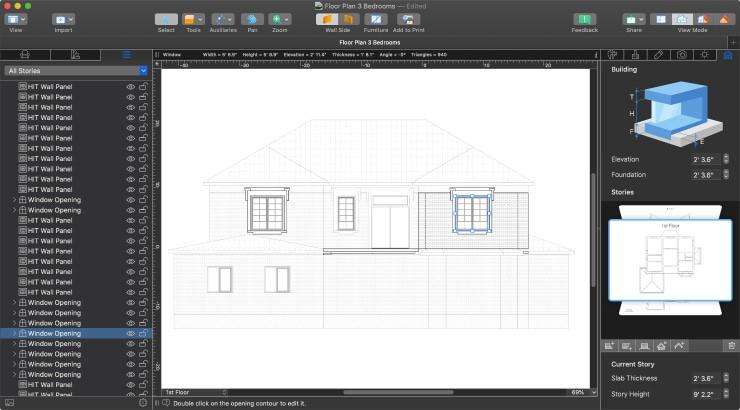
Adjust the Floor Plan in Elevation View:
Elevation view is typically available in specialised architecture software; however, it is also helpful for do-it-yourself projects.
With the use of this function, which shows a project’s side perspective, you may accurately reposition items like windows, apertures, niches, and wall panels—which are typically situated above the floor.
Elevations can be printed or exported later to provide a complete picture of the plan.
Export Your Floor Plan to a Graphic File:
The floor plan is complete, you might wish to export it as a photograph to send to your loved ones, friends, or business partners.
Several graphic formats, including PDF, BMP, TIFF, JPG, and PNG, are supported for export by the programme.